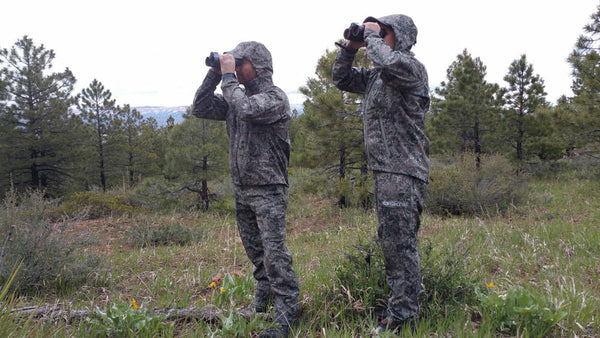
GLASSING, A GAME CHANGER
Sep 09, 2021
Hunting Deer with Dad
I grew up hunting deer with my Dad in Southern Utah. Each year we performed the same ritual. We were up by 4 am saddling the horses by the light of a lantern. The next couple hours were spent heading up the old canyon trail to a place we called the ledges. The ledges were located at the top of a steep canyon which gave way to an open grassy saddle which descended into a jungle of mountain mahogany and rock slides. Deer would often funnel into these areas as hunting pressure increased. There were a couple of steep rocky outcroppings where we would spend the day surveying the big open country that surrounded us. Each year essentially ended with an unfilled tag. As I reflect back on those hunts, I wonder if they would have had a different outcome had we understood the value of utilizing quality glass to locate animals. I wonder how many big bucks were just under our nose, but out of reach of the human eye. Times and advancements in equipment and technique, have certainly changed since those days.
European Optic Companies
As I write this article, there are now dozens of optic companies who offer a wide selection of quality binoculars at an affordable price. The European optic companies, namely Swarovski, Leica, Zeiss lead the pack regarding quality and brightness. However, they are costly. Considering it takes about one year worth of car payments to purchase them. If you can afford to own them, spend the money. You won’t regret it. I own a Swarovski spotting scope and a pair of Leica Geovid binos. I love them. If you’re on a budget, but still want to own some quality glass, Vortex, Minox, Nikon, Leupold, Pentax, Kowa, just to name a few, all offer great glass that won’t break the bank. In my opinion, the Vortex Viper 10×42 is one of the best binos for your money and Vortex has one of the best warranties in the industry. Bottom line, there are a lot of choices for a variety of budgets. What more can I say, get the best you can afford. You won’t regret it.

Figure 1.
Patience and Confidence
The name of the game with glassing is patience and confidence. Sounds easy! Right! A habit, I’ve witnessed, on far too many occasions, is hunters who skyline themselves at first light. They usually glass from a standing position for a few minutes alerting every animal in the drainage. They quickly move on after they fail to locate a trophy. I guarantee they are missing animals. Having confidence in a specific area is the key to spotting more game. If you are confident in a particular basin, give it a full day, or even a day and a half before you make any conclusions mentally. If I have to backpack into an area, I always dedicate, a minimum of an evening, and a morning of glassing. If its an area I’m very confident has what I’m looking for, I spend two mornings and two evenings behind the glass. I have found when hunting above timberline; I can usually spot every animal in a basin in a morning and evening of glassing. When hunting below timberline, a hunter will likely have to utilize multiple glassing spots to be effective. Last fall I was glassing an area above timberline (pictured in Figure 2). There was one spot on a large steep imposing hillside that had an opening about 80 yards wide. My gut told me this was a spot that could hold a big buck. I kept coming back to the spot all day. With light fading fast, I once again slowly and meticulously glassed the area. There he was, like a statue, who had appeared out of nowhere. A big bodied, dark antlered, mature buck. With light fading fast, it was too late to make a move on him. The following day I spent a lot of time behind the glass, and consequently never turned him up. Pictured below and indicated with a white arrow at the top center of the picture is where the big buck appeared. Unfortunately, a large storm rolled in and forced us off the mountain. I hope to get a crack at him next year. Although I did not end up taking the buck, this experience taught me to stick with those areas where I feel confident. Many times having that confidence will pay off.

Figure 2.
Scouting for Vantage Points
Whether I’m scouting new country or hunting the same area, my plan is always the same. My goal, “perching” on the best vantage point at prime glassing hours. Locating the best vantage point will allow you to glass more country. It will allow you to peek into small “hidey” holes that other vantage points simply won’t allow you to see. Time spent walking from one vantage point to another burns up prime glassing time. I do a lot of Google Earth scouting in my spare time. When I discover a new drainage that holds promise, I immediately locate, using Google Earth, a few of the best vantage points and save the GPS coordinates so I can find them in the dark. The difference between an ok vantage point and the best vantage point can make all the difference. The best glass in the world will never compensate for a poor glassing location. Figure 3 is a picture of a basin taken from an excellent vantage point. I spotted and later killed a big nontypical in this basin. A solid vantage point allowed me to glass this buck from well over a mile away. Once I locate a great vantage point, I experiment with moving up or down in elevation until I find the sweet spot. Relocating even a few yards can make all the difference.

Figure 3.
A Sequence for Success
I utilize two sequences when glassing. The first is a quick scan, and the second is extended glassing. I have heard of countless ways to effectively glass an area. Some guys use a grid system. Some glass from the bottom of a drainage and work their way to the top. Some glass from the top of a ridge to the bottom of a drainage. Just as there are a million ways to skin a cat, there are many ways to effectively cover a given area. I have found it far more important to focus on which areas you glass first, than how you effectively cover an area. When I reach my vantage point, I slowly ease into my spot, being careful to keep myself concealed. I quickly scan all open areas closest to me. Many times, hunters are so anxious to glass the opposing hillside that they miss animals that are right under them. Next, I glass open ridge tops on the opposing hillside followed by open areas. At this point, I’m looking for animals feeding over a ridge, in the open, or on the edge of the timber. I quickly repeat this sequence a few times, before settling into an extended glassing session. Many times I will spot what I’m looking for within minutes of arriving at my vantage point. If I don’t turn up what I’m looking for in the first sequence, I settle into my second sequence; extended glassing. This is the moment when the tripod and bino adapter comes out of the pack. If you have never mounted your binos on a tripod, you are missing out. After I get adequate padding under my backside, I immediately secure my binos to my tripod and settle into an extended period of glassing. The stability offered by mounting binos to a tripod gives me two advantages. First is eye relief. Eye relief allows me to glass for long periods without getting a headache. It allows me to scrutinize every square inch of the glass-able country visually. It allows me to see deeper into the shadows. It is imperative that your binos be motionless for you to see animals hiding in the shade of a tree or a ledge at a long distance. Simply put, you will spot animals using a tripod that will be impossible to spot supporting your binos with your own two hands. The big nontypical pictured below is the result of using quality glass atop a solid tripod. I would have never spotted this buck without the use of a tripod.


